Badge Printer
How Badge Printer works
A badge printer can link with Visitor Tablet to print visitor badges automatically. The badge is a small piece of paper that displays visitor information after they sign in. You can choose to use sticker label, or colored label to make it more stand out.
Hardware Requirements
Supported Printer
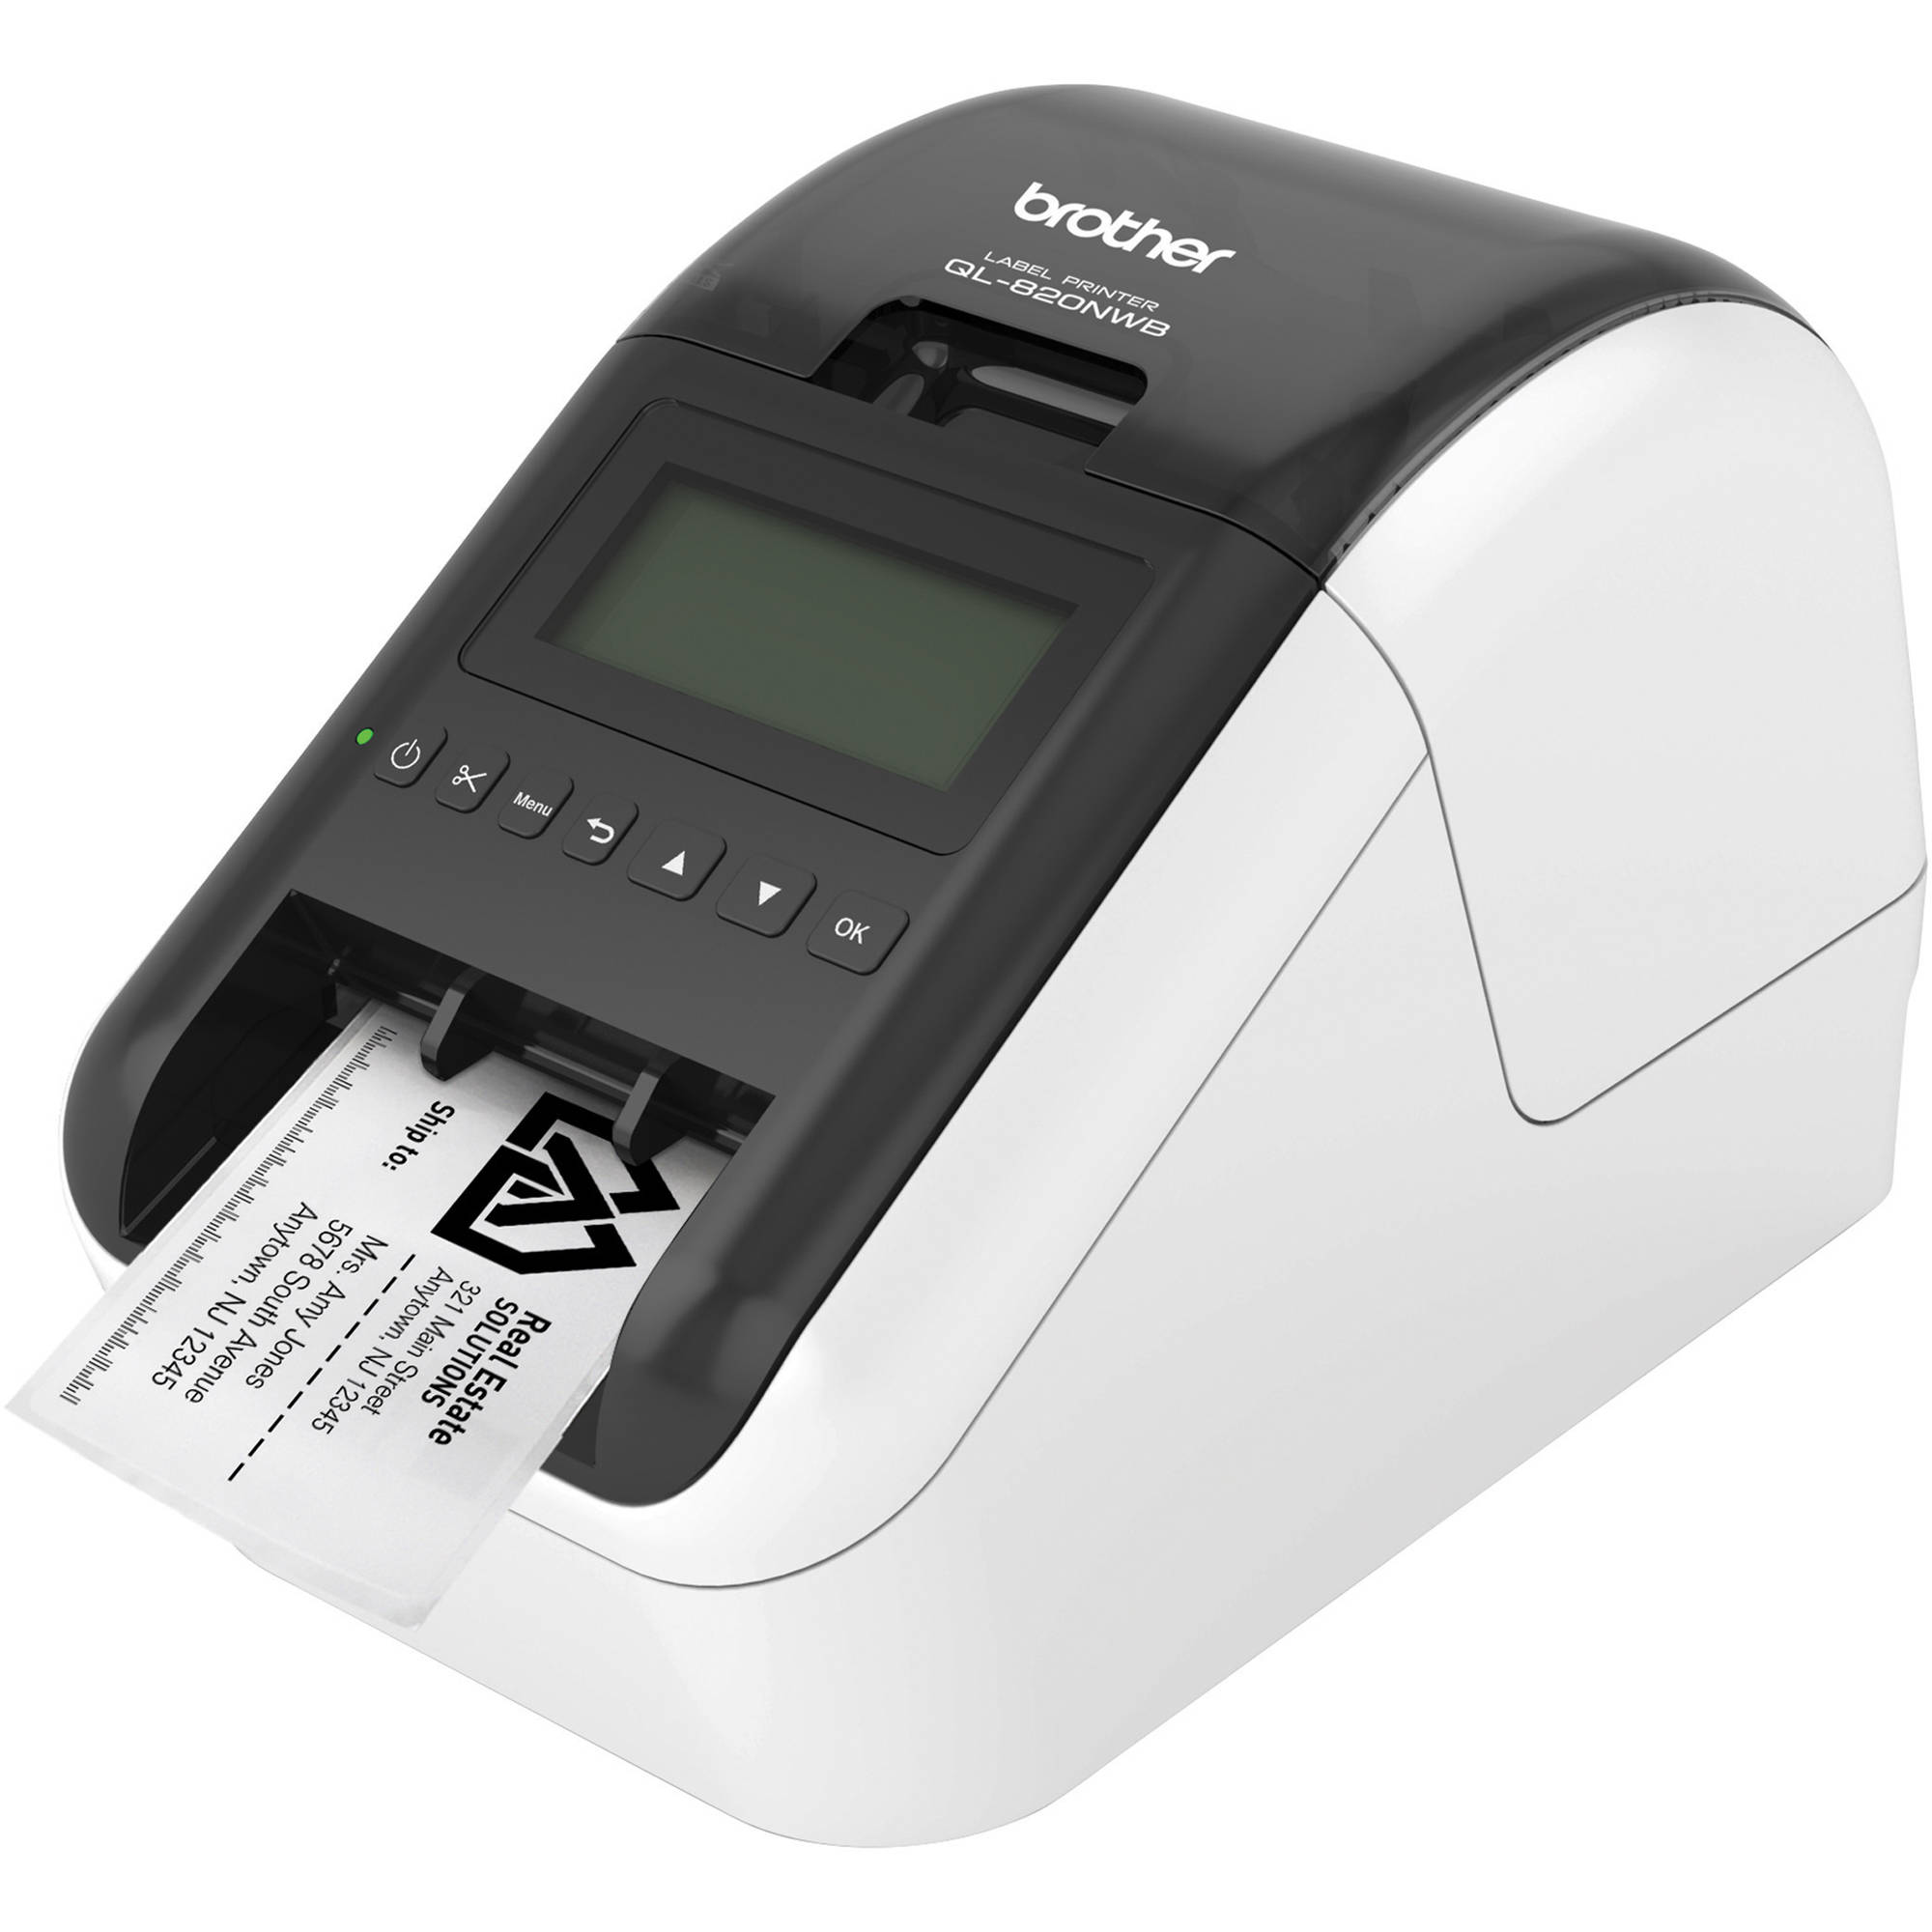
Brother QL-820NWB is currently the only model we support. You may purchase it on Amazon or your favorite store.

Label Supplies
The following label supplies are supported:
- Brother DK-11234
- Brother DK-22251
- Brother DK-44205
- Brother DK-N55224
Set up Badge Printer
Before you set up badge printer, install and power on the printer and configure settings using the following steps:
Install Printer
Unbox the Brother QL-820NWB printer.
Unbox one of the supported label supplies.
Assemble and insert the label into the Brother QL-820NWB printer.
Plug the black power cord into the printer and a power plug., Power on the printer. Make sure the green status light is on.
Use the [▲], [▼], and [OK] buttons to set language, date and time as prompted.
Turn off automatical power-off:
Press the [Menu] button
Use the [▲] and [▼] buttons to select Settings and press [OK]
Use the [▲] and [▼] buttons to go to option Auto Power Off and press [OK]
Select option 'Adapter' is selected, press [OK]
Use the [▲] and [▼] buttons to select option Off and press [OK]
- Turn off template mode:
Press the [Menu] button
Use the [▲] and [▼] buttons to select Settings and press [OK]
Use the [▲] and [▼] buttons to go to option Template Settings and press [OK]
Use the [▲] and [▼] buttons to select Template Mode and press [OK]
Use the [▲] and [▼] buttons to select option Off and press [OK]
There are two connection methods to set up badge printing:
Setup with Cable/WIFI
Network Requirements
There are a few network requirements to set up printer with Cable/WIFI connection. Talk to your IT department to make sure both requirements are met before configuring printer.
- A static IP Address for the badge printer
:::note
It is strongly recommended to use a fixed IP address for your badge printer. Although an automatically assigned DHCP address works, it is possible for your printer to stop working after a few days, because the IP address might get changed. Talk to your IT Department to help you set up a fixed IP address for the badge printer.
:::
- Network Port
The following ports should be open between the Visitor Tablet and the printer within your local network:
- UDP 161 (SNMP – Printer Status)
- TCP 5900 (Data – Printing)
:::note
If you are using WIFI connection, the Brother printer only supports 2.4 GHz wireless band connection. Be sure your router supports 2.4GHz connections.
:::
Configure static IP address via MAC
To configure static IP, your IT department needs to know the MAC address of the printer. Follow these steps to find the necessary information:
Turn on the printer.
Make sure label paper is loaded.
Press [Menu] to enter Settings
Use the [▲] and [▼] buttons to select option Information and press [OK]
Use the [▲] and [▼] buttons to select option Print Configuration and press [OK]
Use the [▲] and [▼] buttons to select option All and press [OK]
Use the [▲] and [▼] buttons to select option Start and press [OK]
The printer now prints some pieces of paper which contains the settings of the printer. Look for NETWORK CONFIGURATION and then MAC Address on the print. It is similar to the following:
<<NETWORK CONFIGURATION>>
<Interface>       WiredLAN on
...
<MAC Address>     [XX-XX-XX-XX-XX-XX]
...- Provide the [XX-XX-XX-XX-XX-XX] MAC address to the IT department to be assigned a static IP address.
Set Static IP Address on Printer
Once your IT department assign an IP address to your printer, follow these steps to set a static address to the printer:
On a desktop computer connected to the same network as the printer, open a web browser and type the printer's IP address
Enter the following credentials:
User: admin
Password: access
Click Network Configuration at the top of the page.
Click Configure TCP/IP
Enter the static IP, Subnet Mask, and Gateway as provided by the IT department.
Set Boot Method to Static.
Click Submit.
Setup with Bluetooth
Enable Bluetooth
After unboxing your printer, follow the steps below to install printer:
- Press the [Menu] button on the printer and enter Settings
- Use the [▲] and [▼] buttons to select Bluetooth and press [OK]
- Use the [▲] and [▼] buttons to select Bluetooth (On/Off) and press [OK]
- Use the [▲] and [▼] buttons to select On and press [OK]
- Use the [▲] and [▼] buttons to select Automatic Reconnection and press [OK]
- Use the [▲] and [▼] buttons to select On and press [OK].
- Press the [↩] button to return to the main screen. You should see the Bluetooth icon in the top right.
Connect to the printer on Visitor Tablet
- On your Visitor Tablet, open the Settings app. Go to Settings > Bluetooth.
- Ensure that Bluetooth is turned on.
- Under Devices, look for Brother QL-820NWBxxxx, like “Brother QL-820NWB1234.”
- The series of 4 digits at the end of the device name identifies your specific printer. We recommend writing these digits on the back or bottom of your printer.
- Choose the printer, in the dialog, choose Pair
Enable Badge Printing on Visitors portal
Badge printing can be configured for individual visitor type.
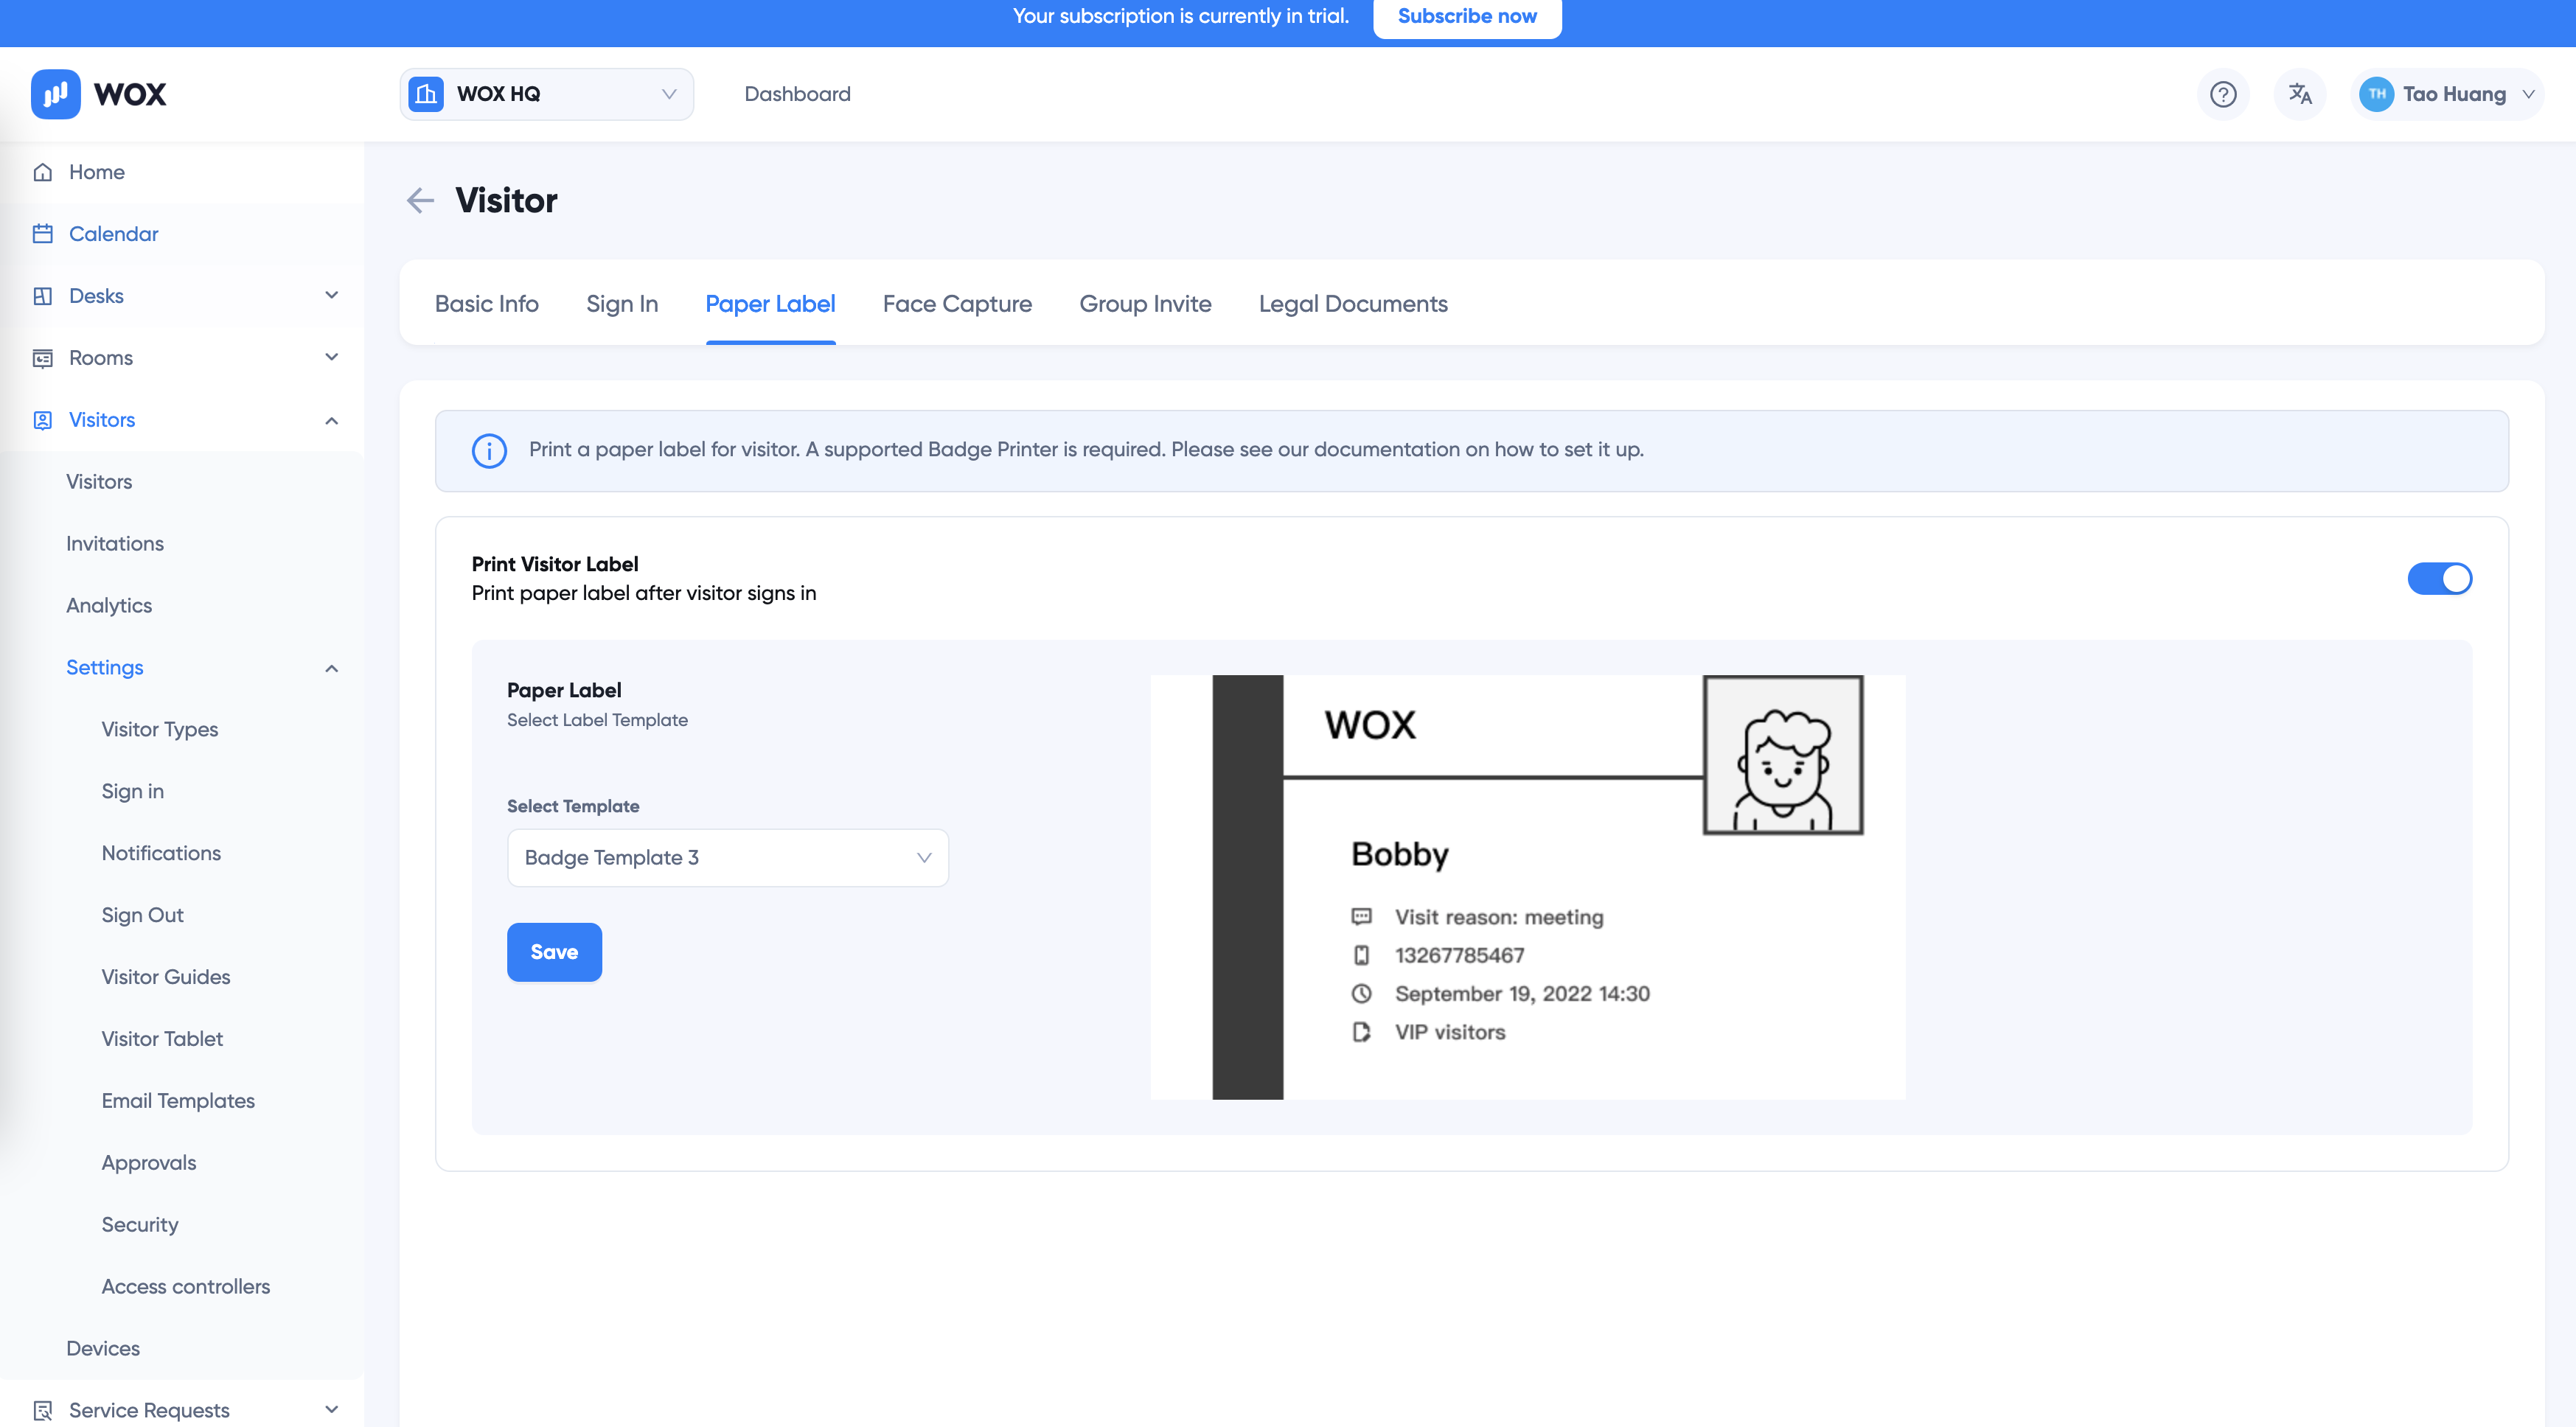
To configure badge printing, go to Visitors > Settings > Visitor Types, click the Edit button on the visitor type to edit.
Select Paper Label tab:

Turn on/off Print Visitor Label option.
If the option is On, choose which template you would like to use for the visitor type.
Click Save to save settings.