Users and Departments
In order for employees to use WOX, they need to have user accounts in WOX. Each user account in WOX corresponds to a user or employee. Each account contains information including employee name, email address, mobile phone number(optional), password, job title(optional), job number(optional), gender(optional), and more. Employee uses the account and its credential to access WOX. There are many ways to create user accounts in WOX:
Users
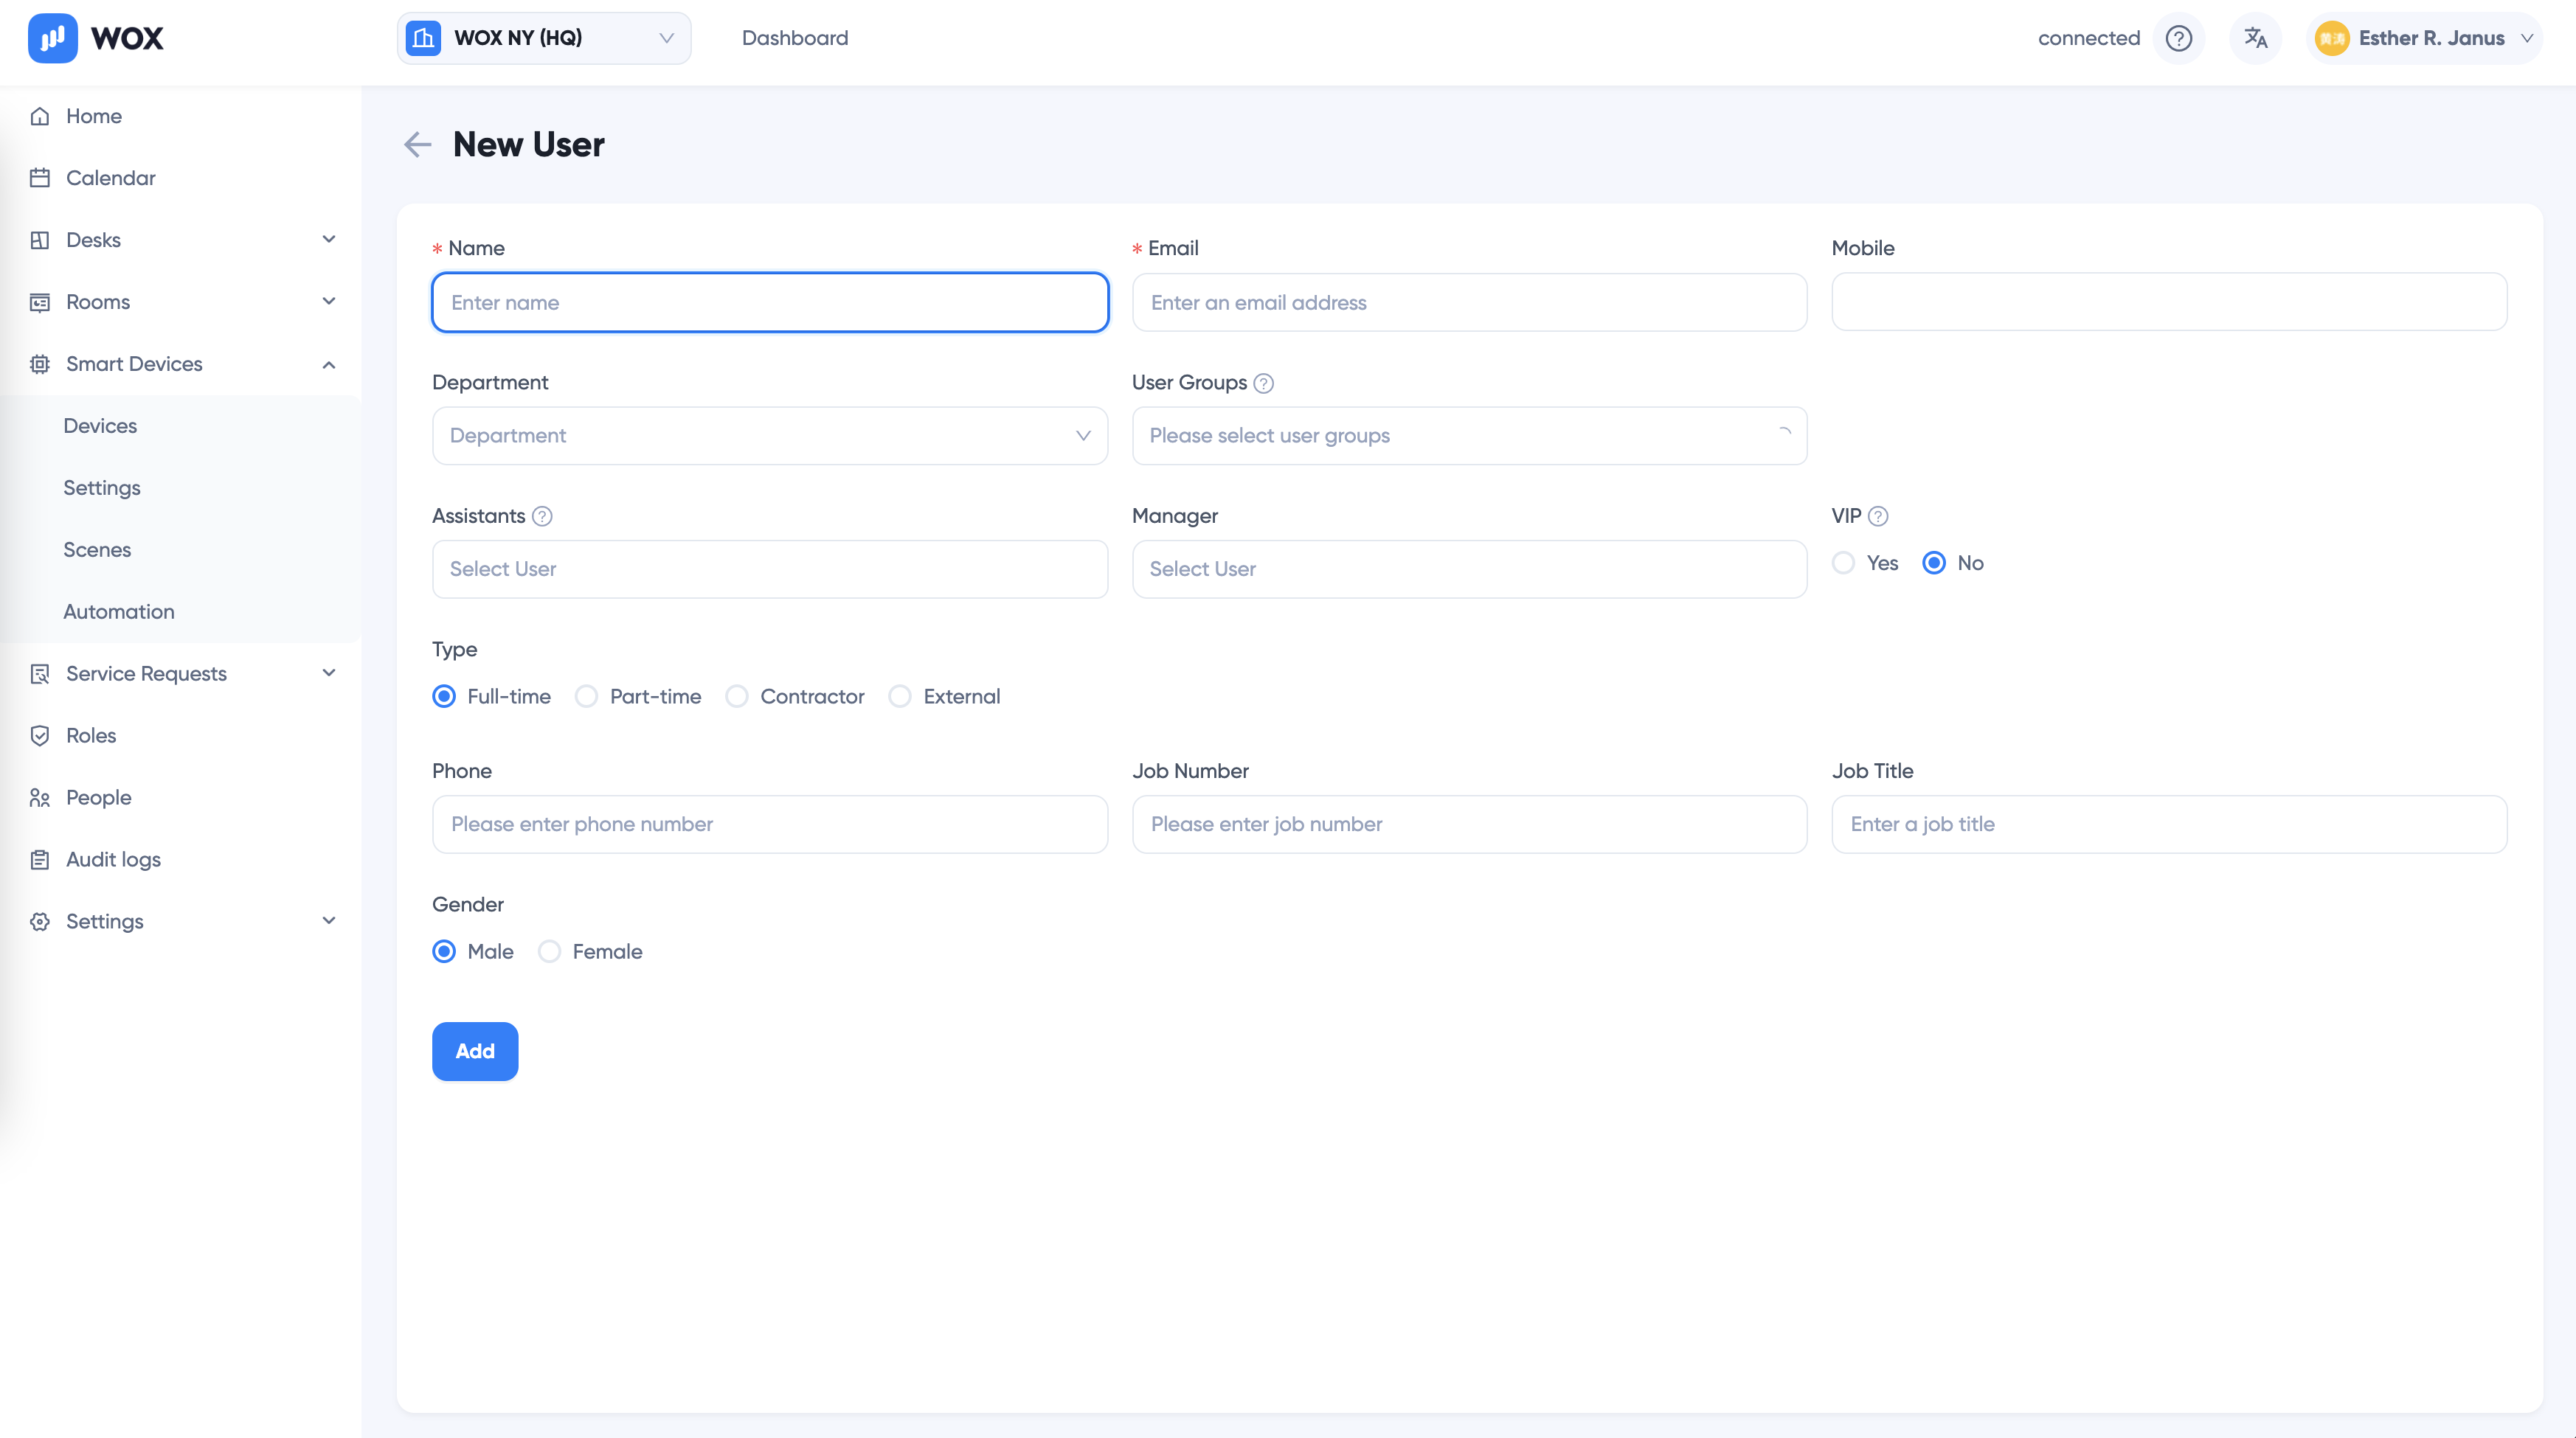
Manually add a user
Go to Location > People > + New Employee to add new employees:
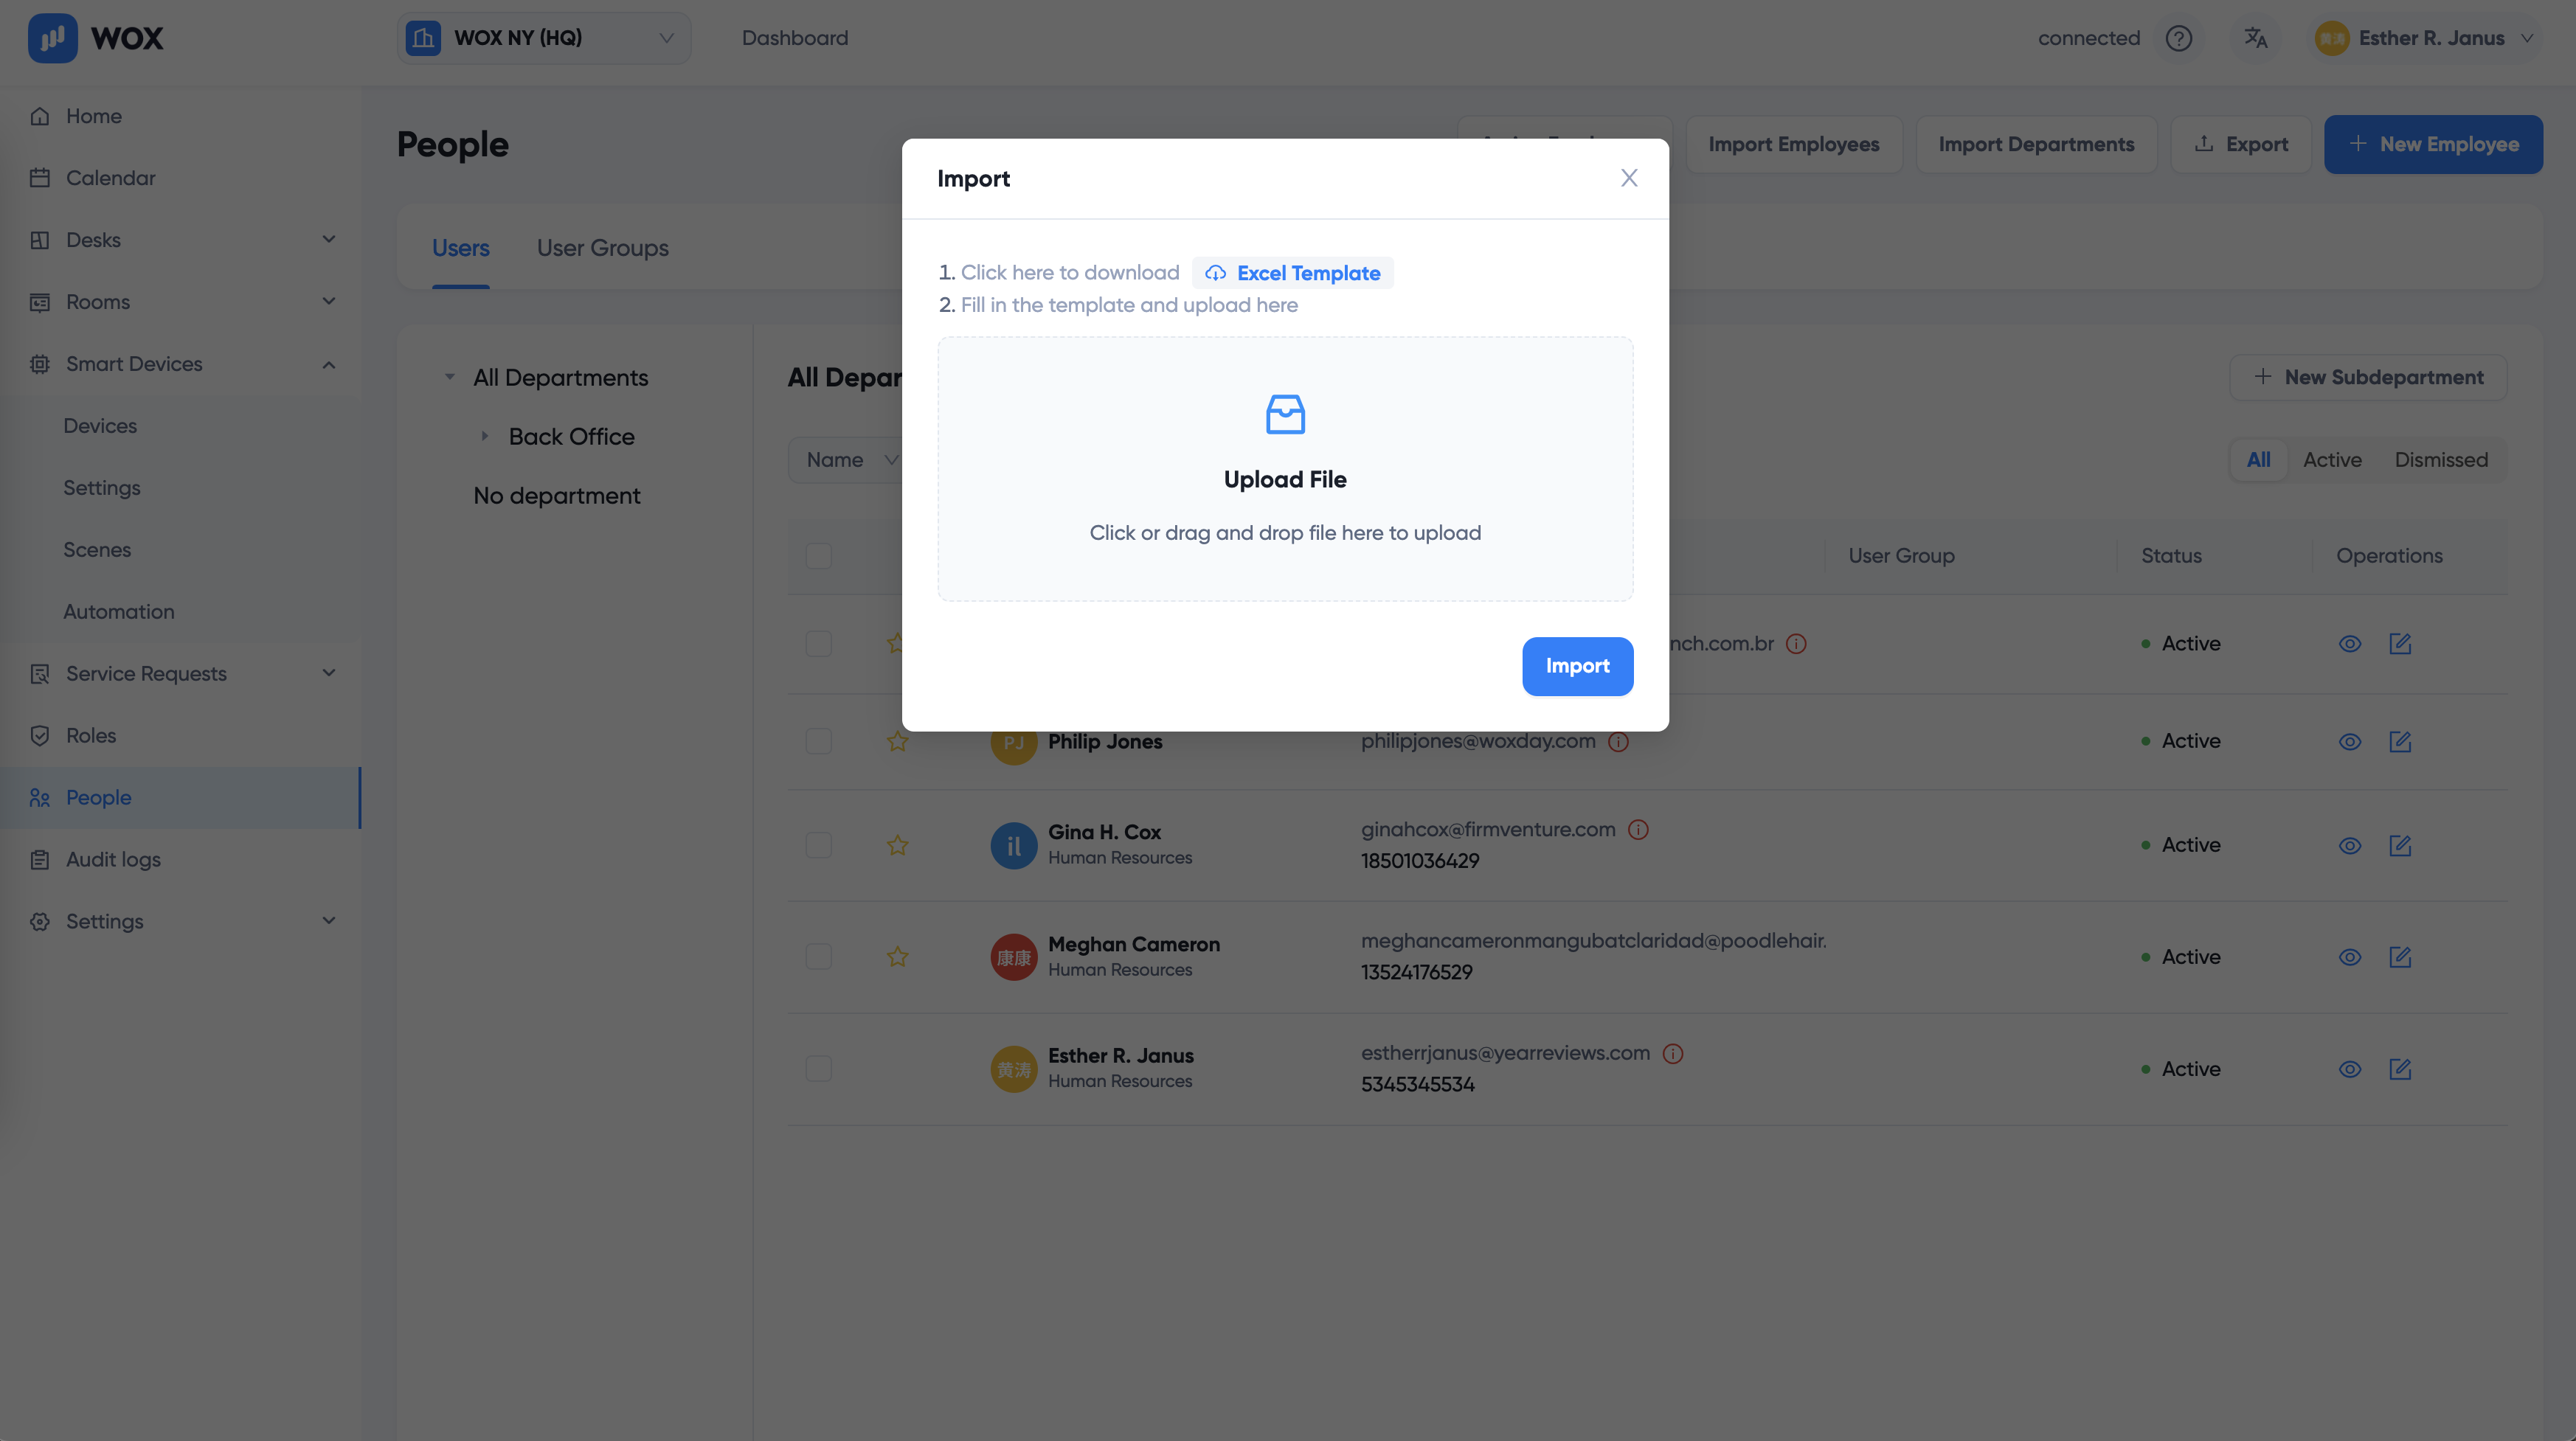
Batch upload users using Excel
Go to Location > People > + Import Employee to import employees using Excel template:
Set up [Directory Synchronization]
If you are using SCIM providers such as Microsoft Azure AD, Google Workspace, Onelogin, Okta etc, you can set up automatic directory synchronization. The benefit of this solution is not only the information is always up to date, but also more secure because no passwords are needed and employees can use Single Sign-On to login WOX.
Departments
Department information can also be created or synchronized from directory. In WOX, departments are hierarchical. Each department can have one and only one parent department, but have many children departments.
TIP
- An employee belongs to at most one department. In some cases, an employee can belong to none of the departments.
- If a resource is assigned to a department, it can be used for all employees in that department and its children department.
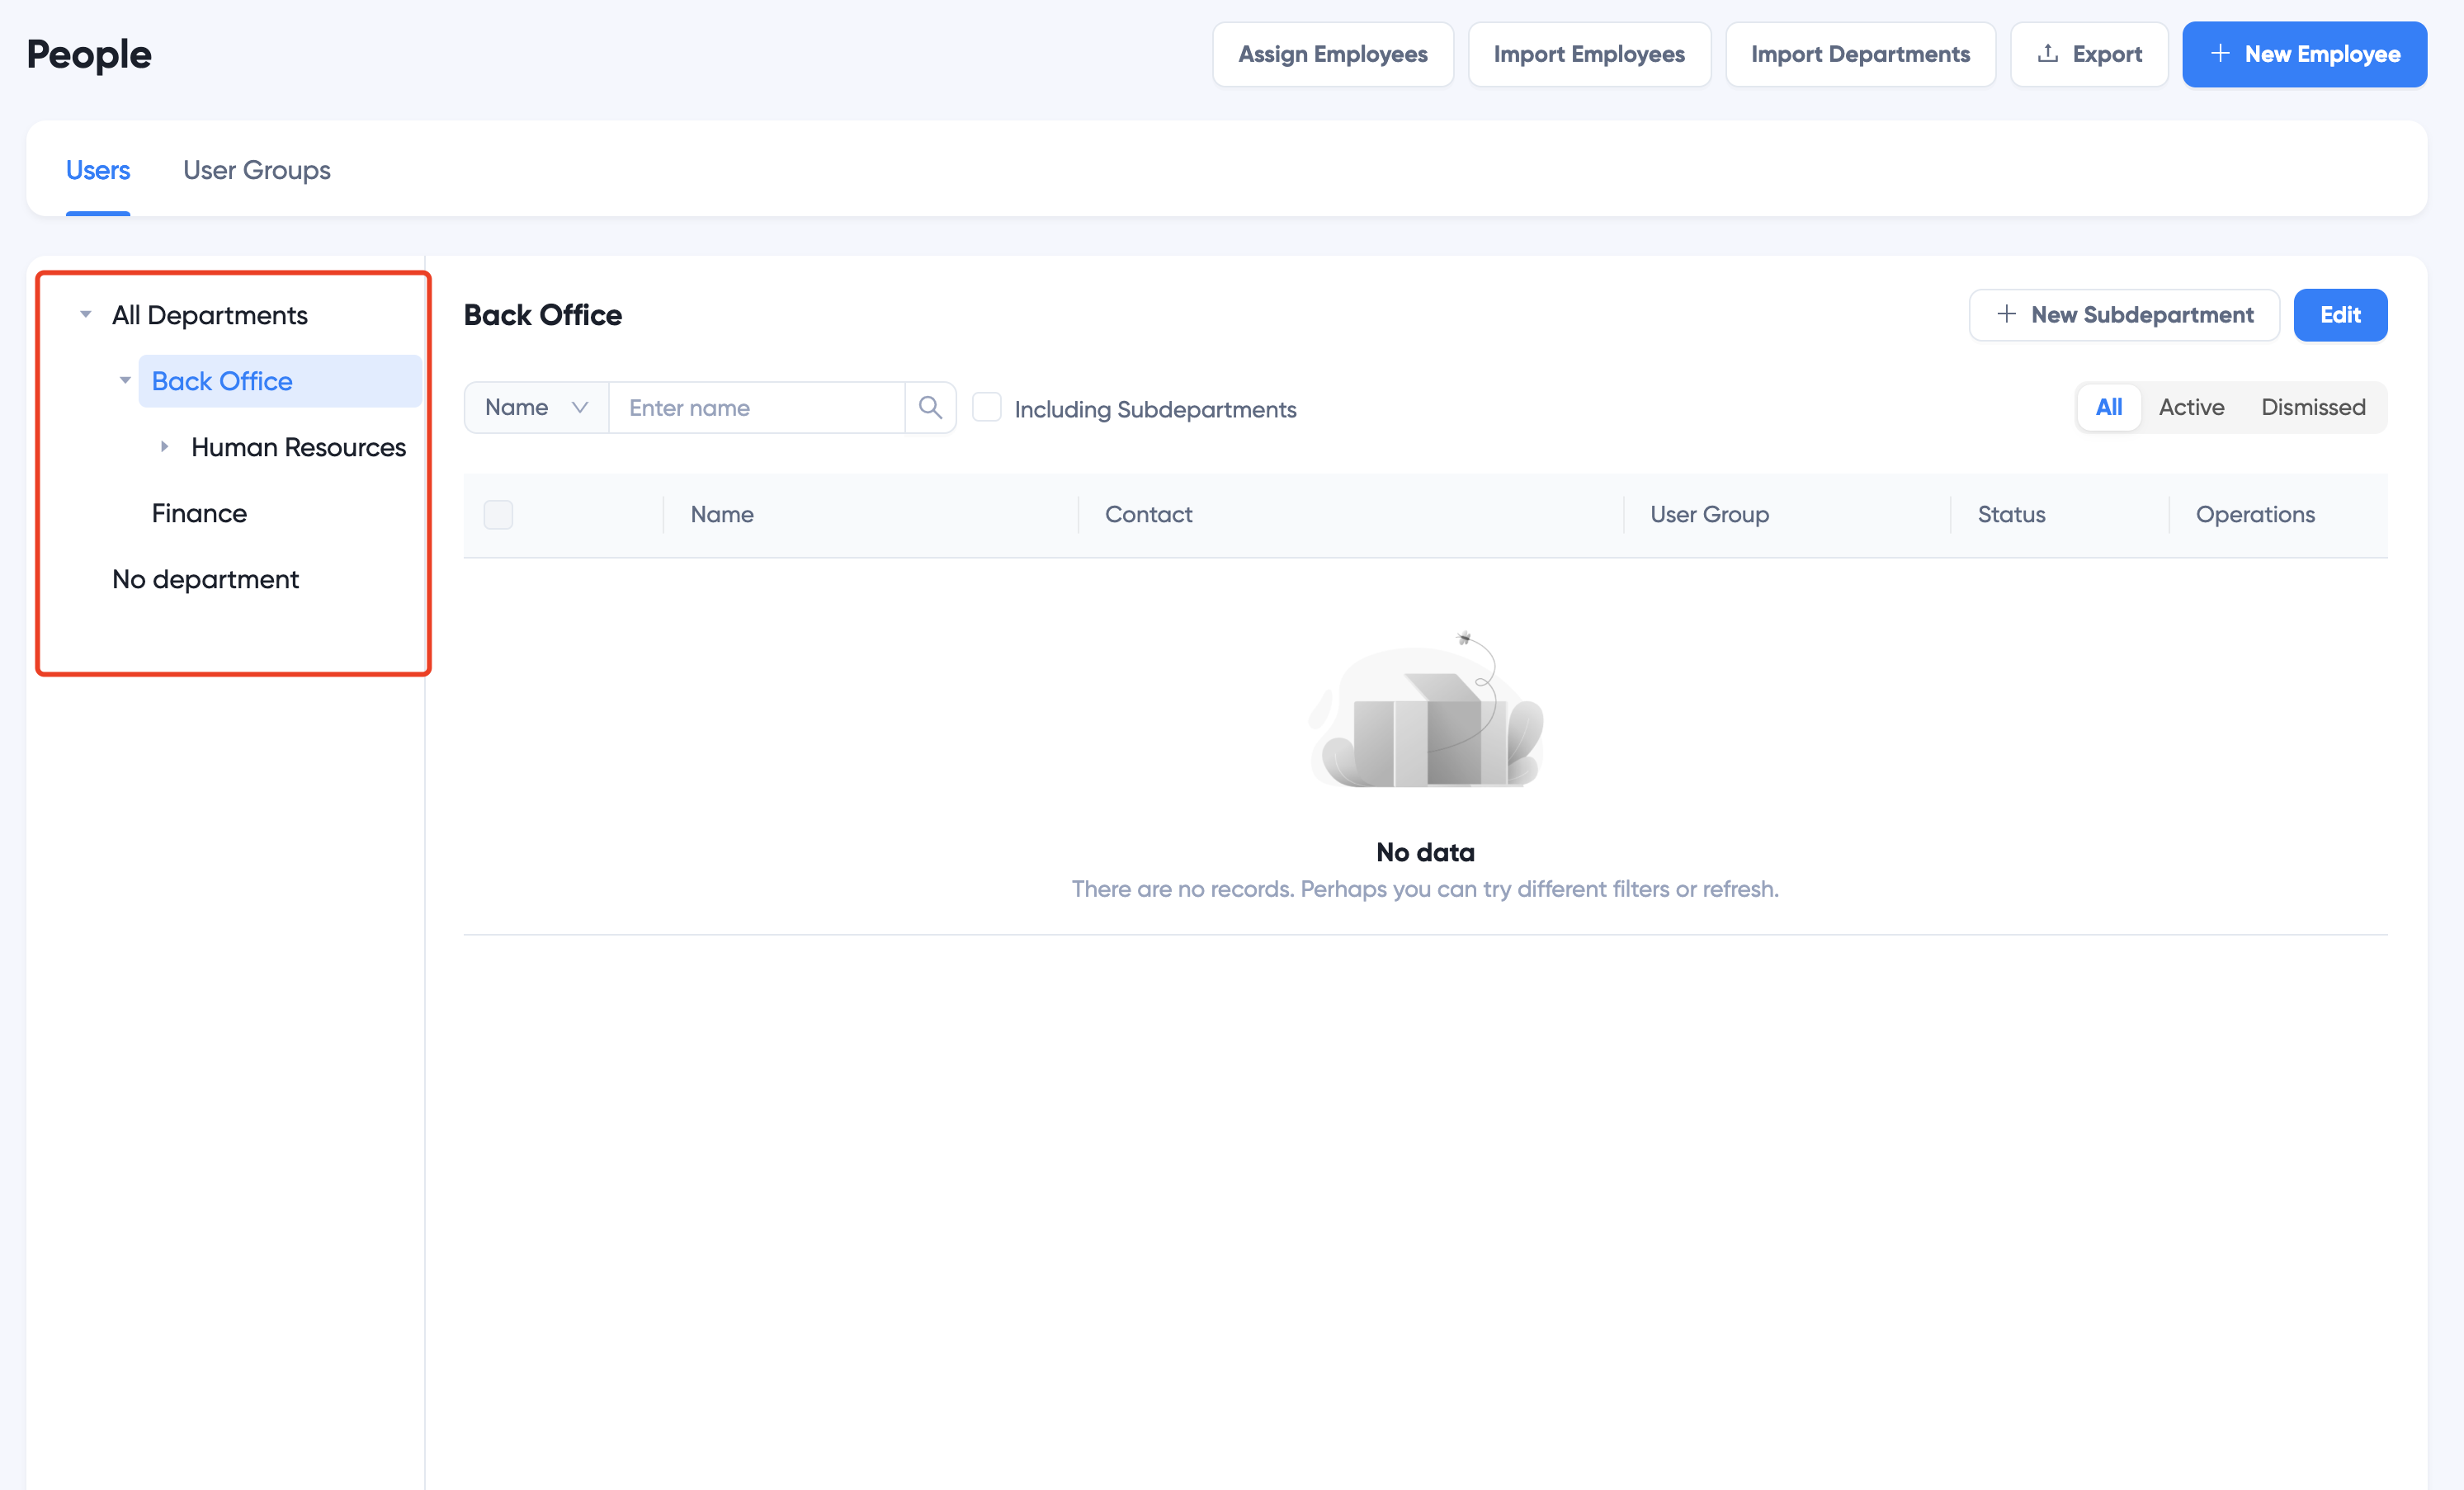
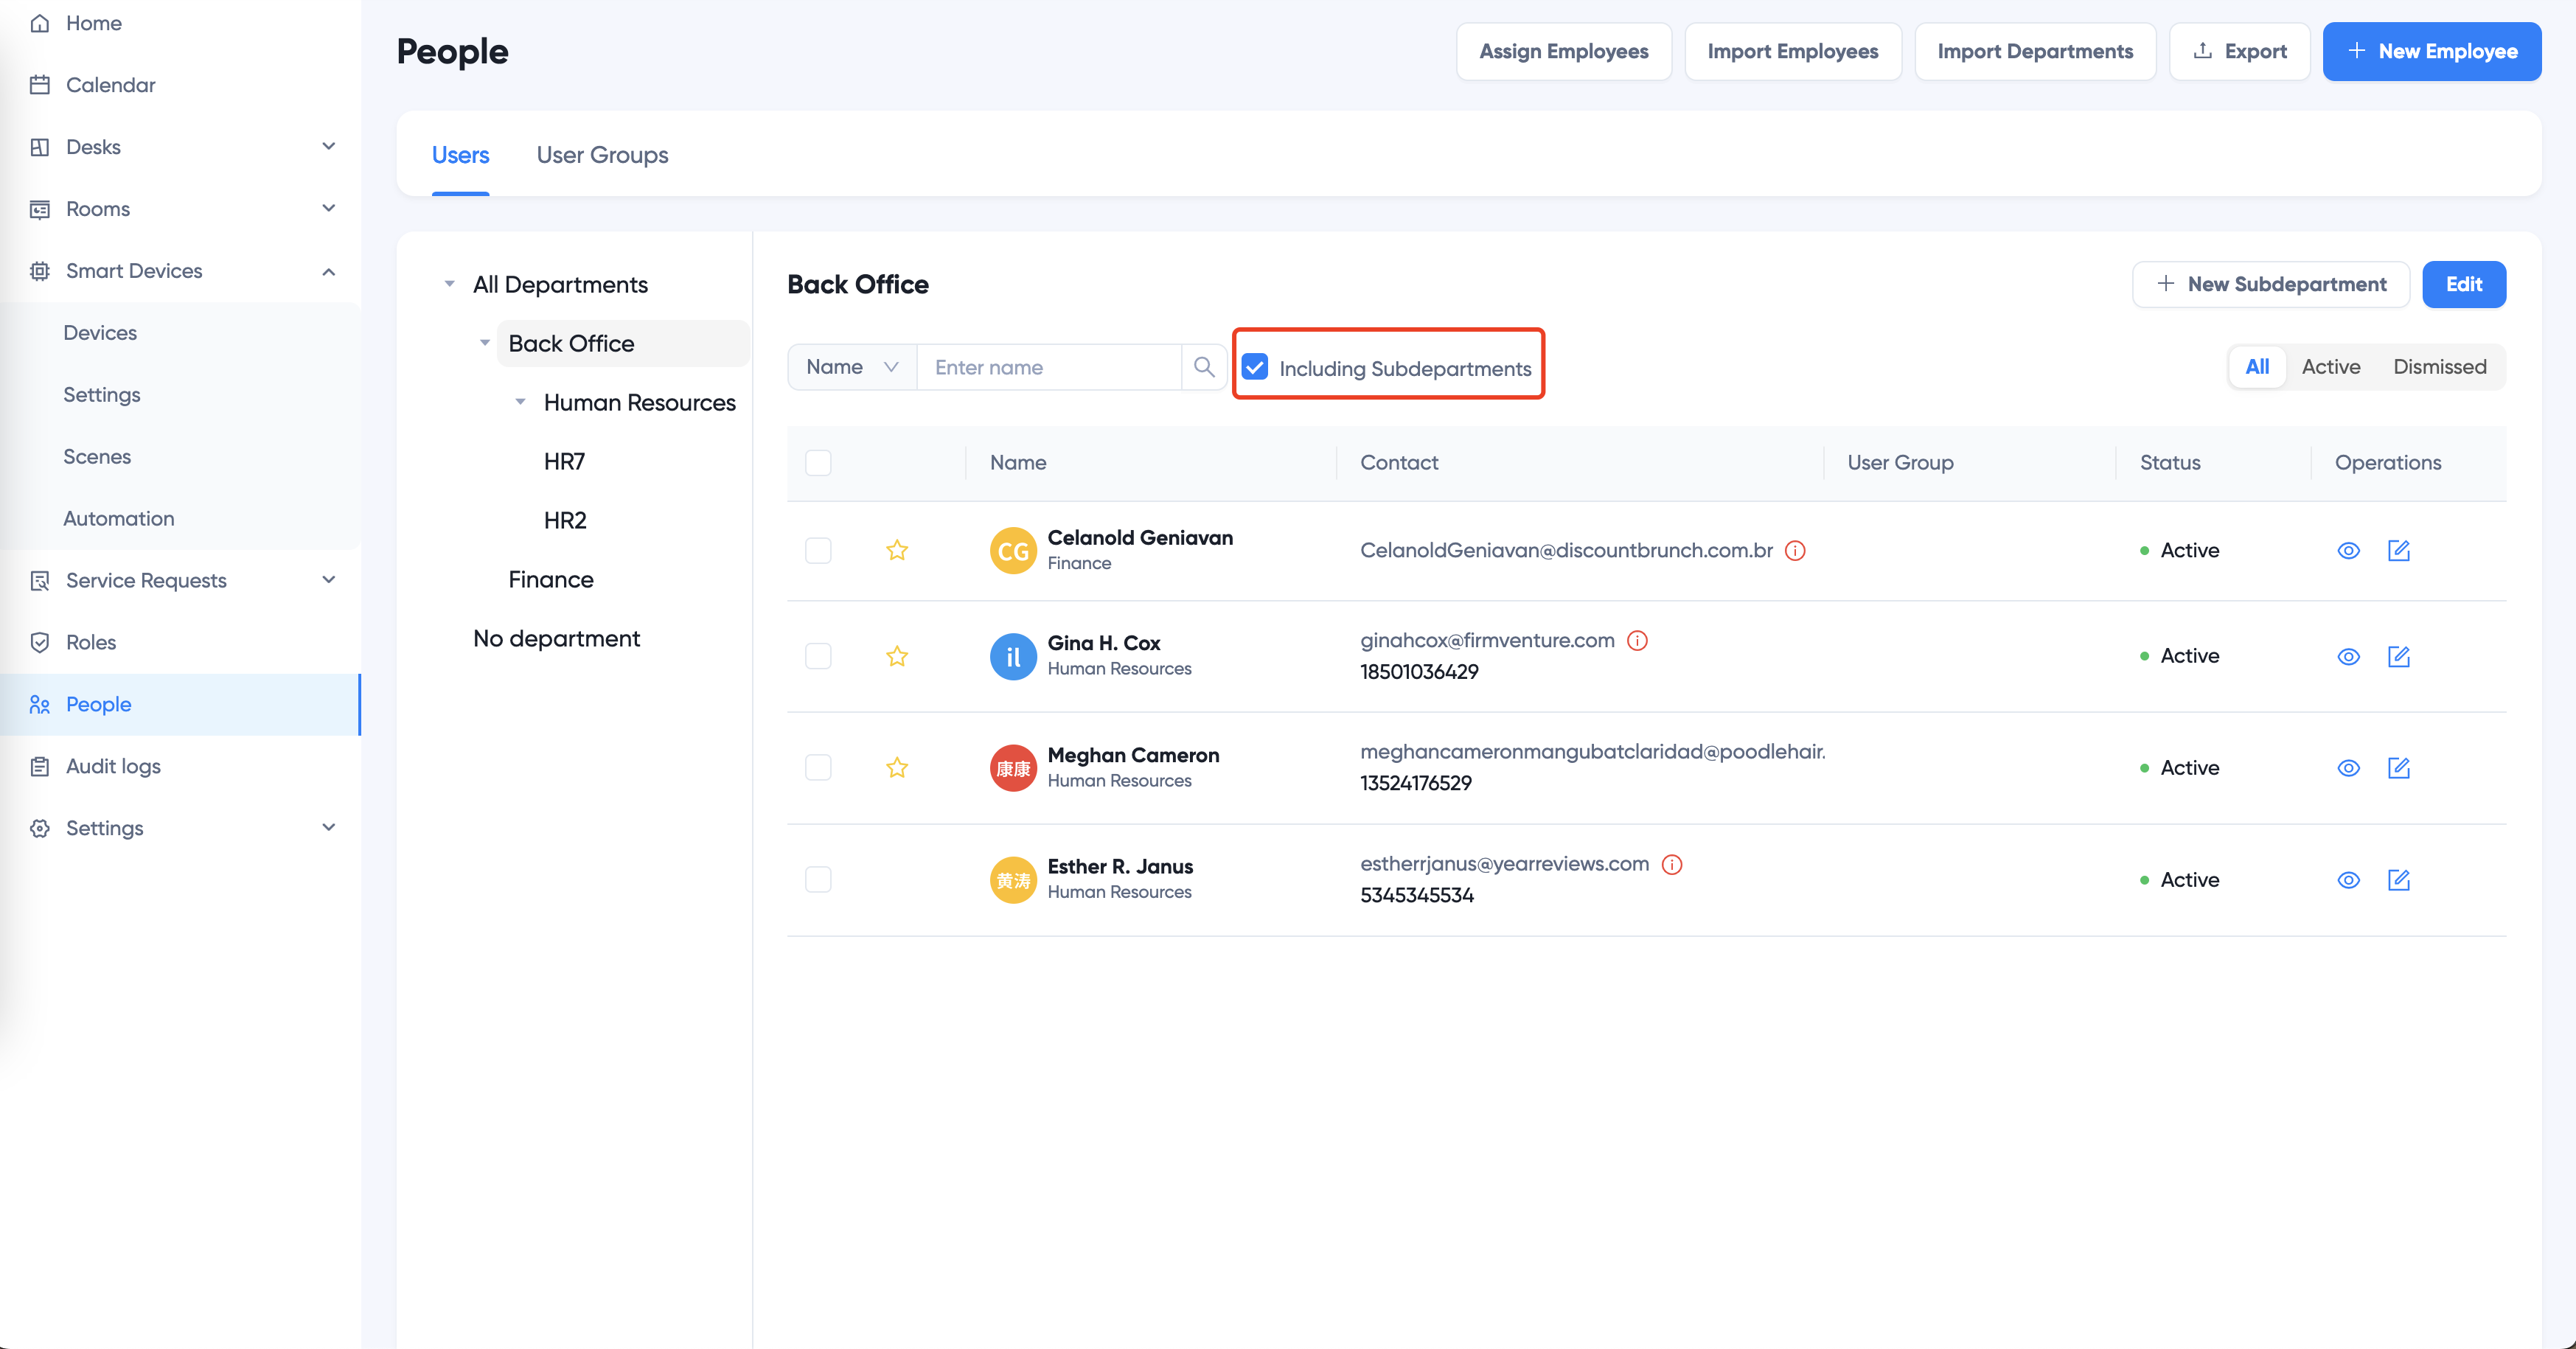
Select department on the tree to view all employees in the department. Check Including Subdepartments to view employees in descendant departments as well:
Create Department
- Click + New Subdepartment to add new department:
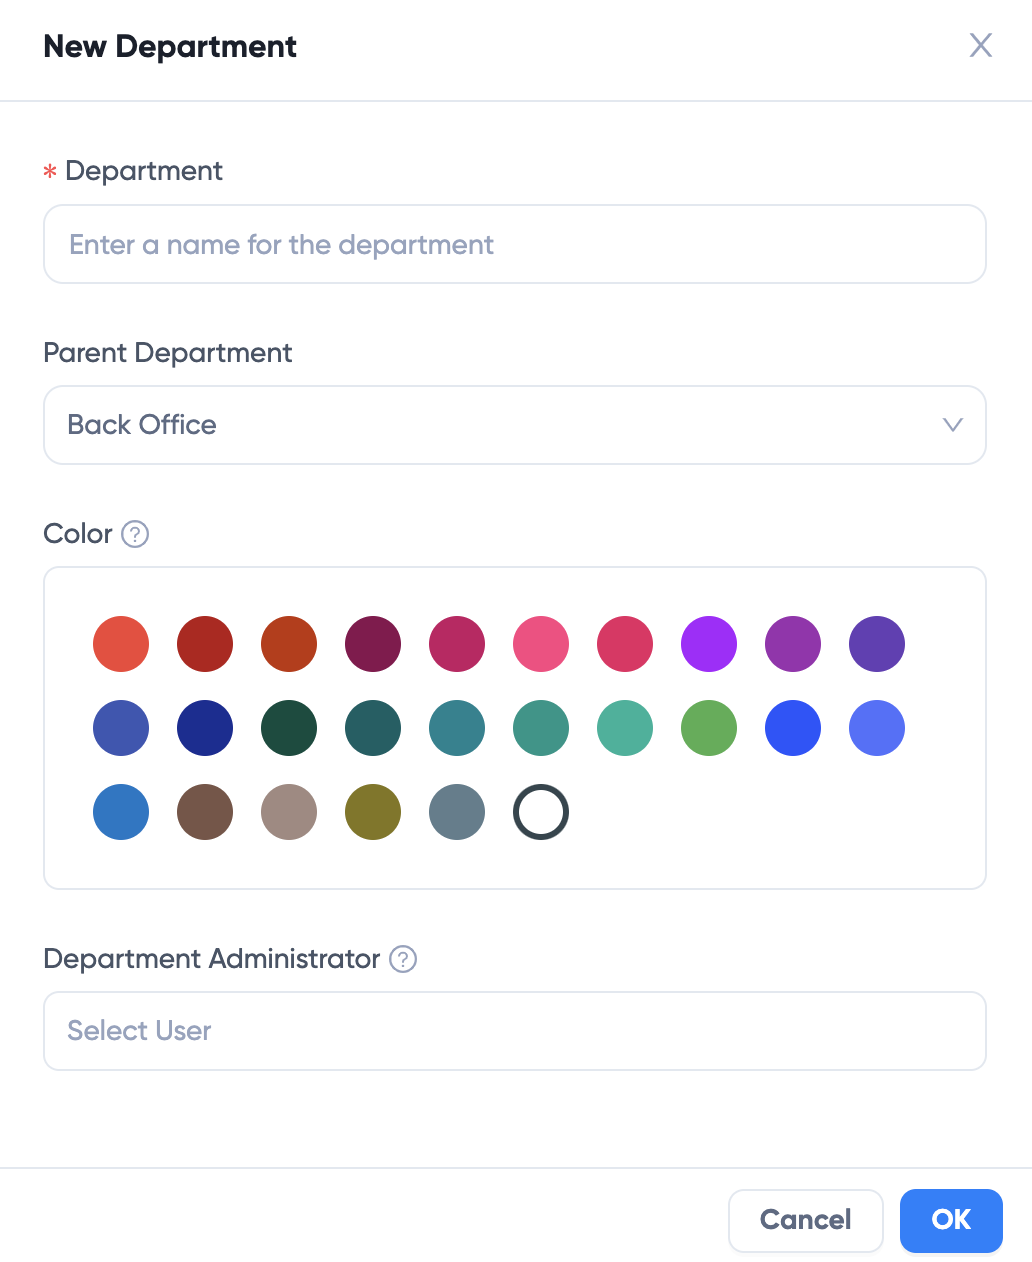
- Name: name of the department
- Parent Department: select parent department. If there's no parent department, the department is placed under the organization.
- Color: each department has a color that helps identify its resources and employees.
- Department Administrator: select employees who can manage the department employees and resources such as desks.
Click OK to save
- Click Import Departments to import departments using Excel:
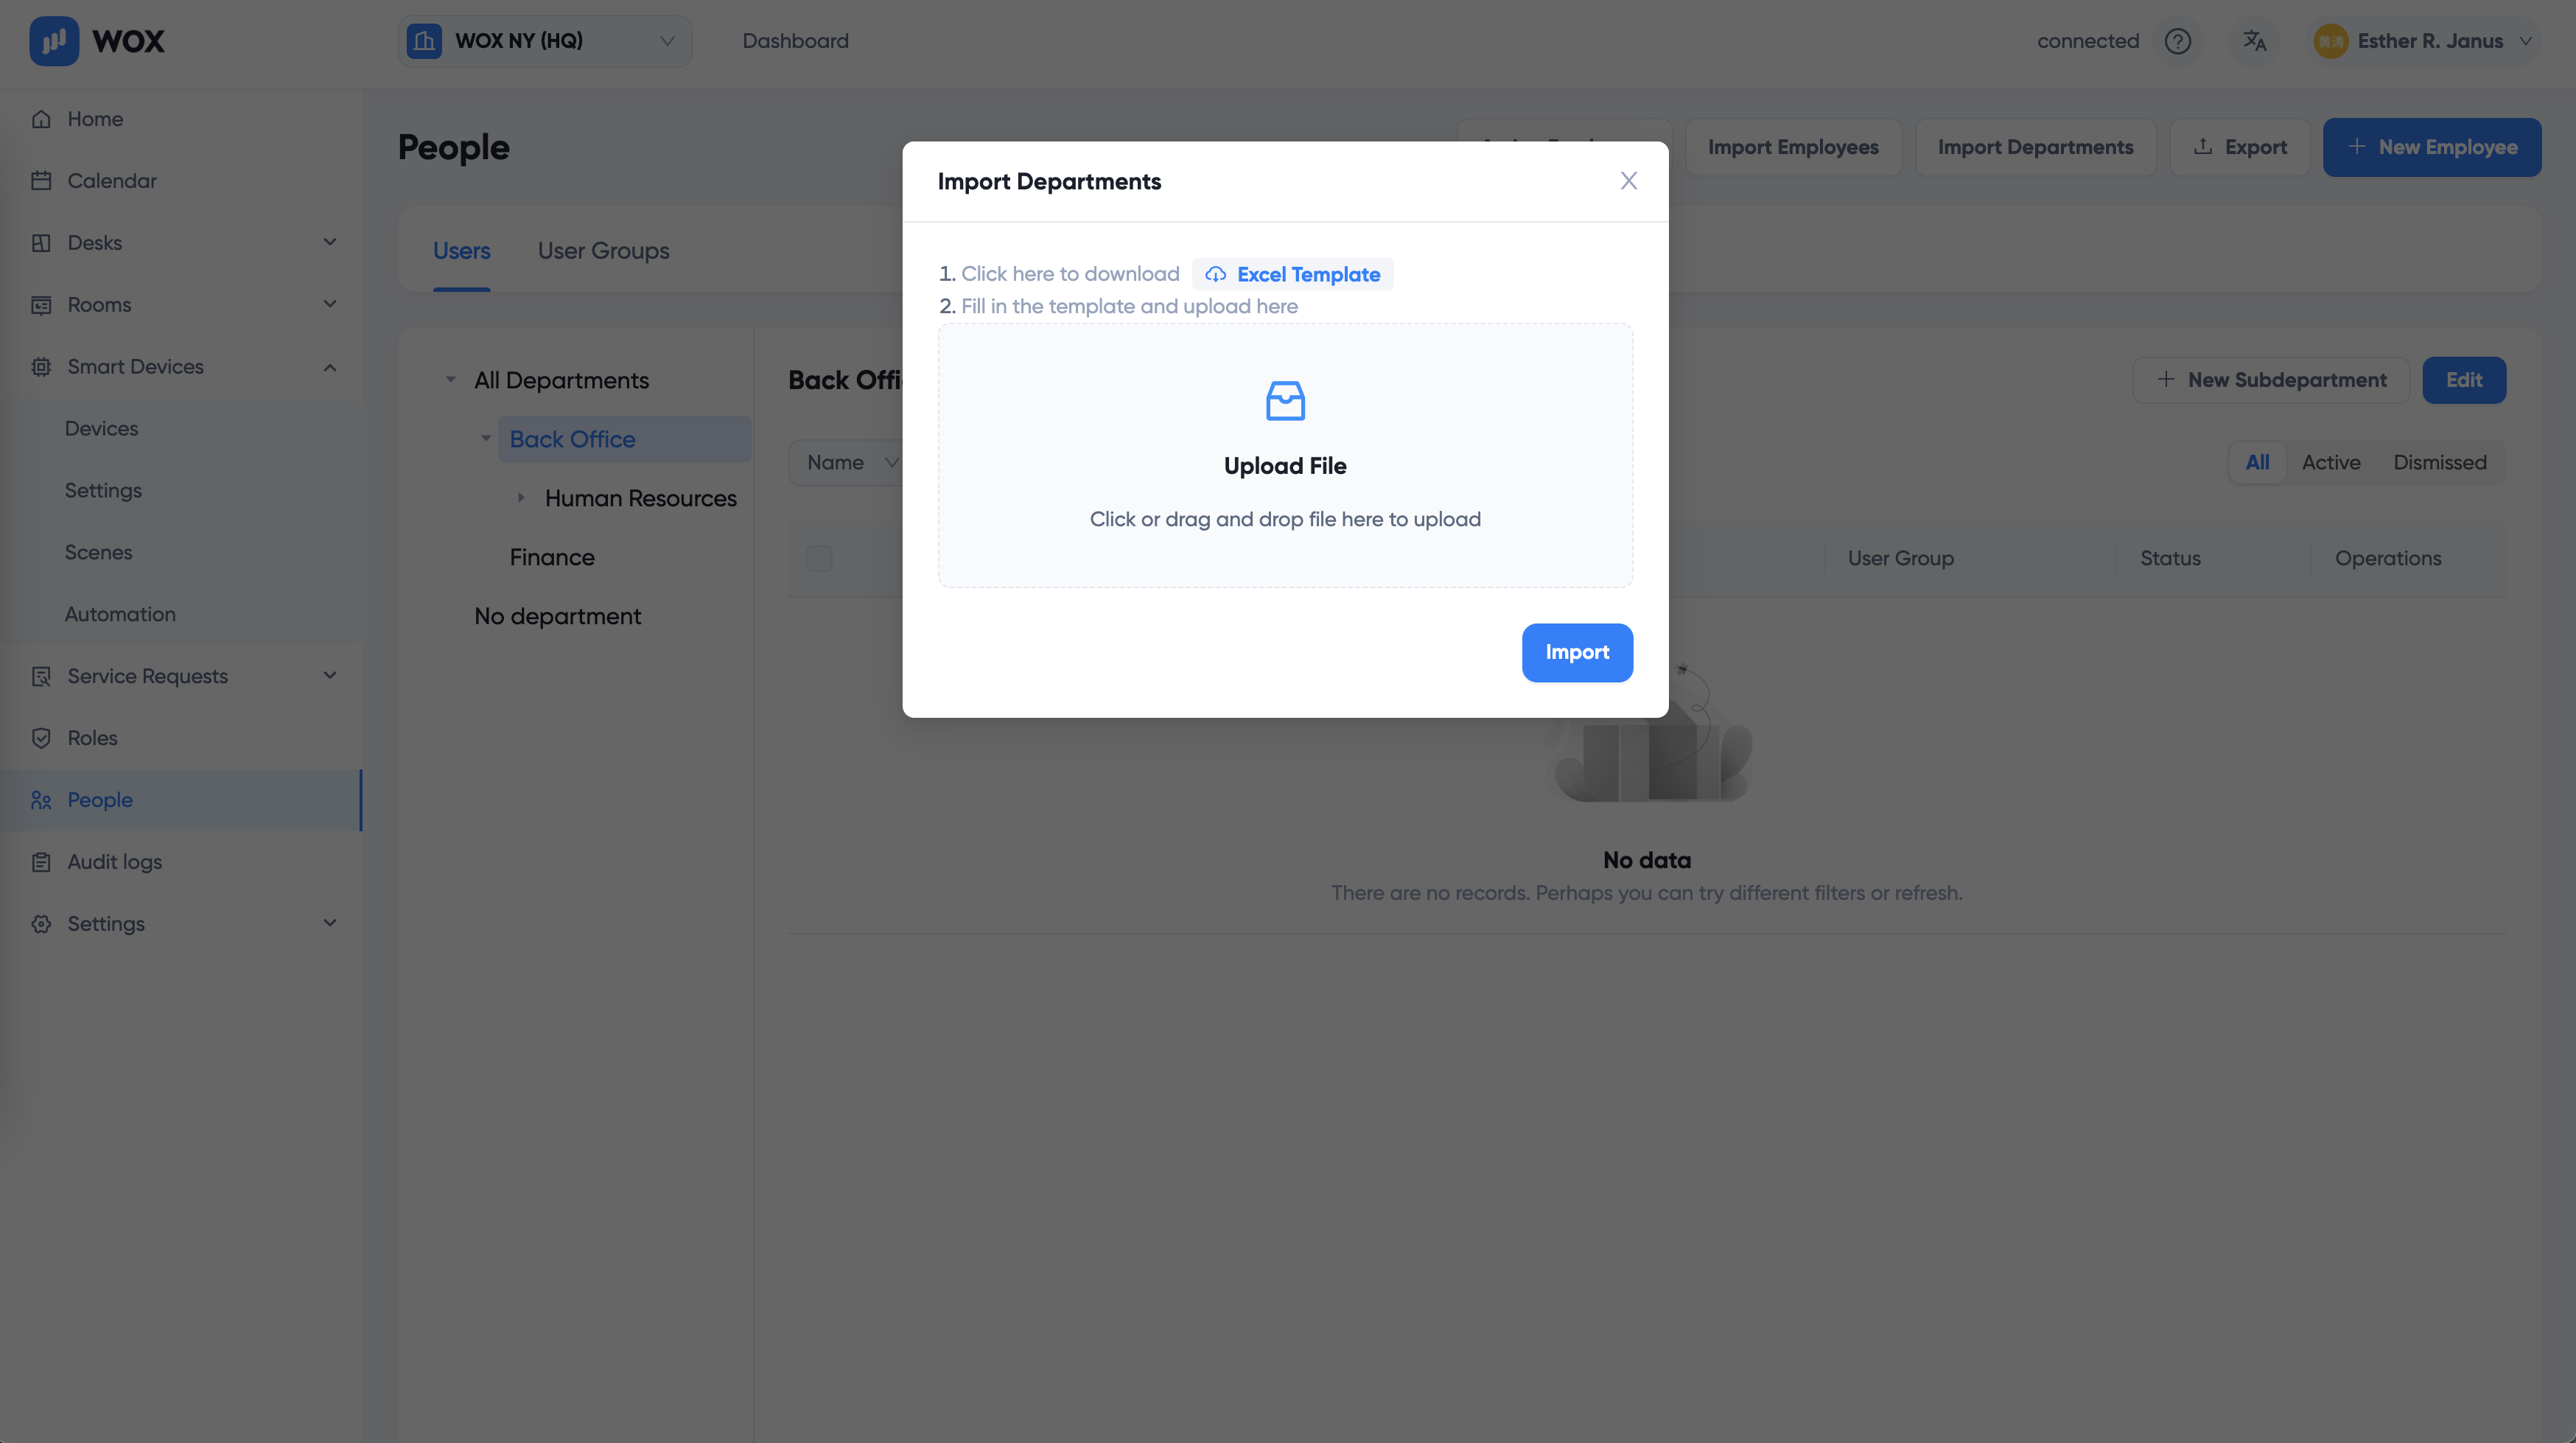
- Download the Excel template
- Fill in the information as instructed. Note department name should be unique
- Click or drag and drop to upload